


Store Management
Customize Your Store with Pinning, Collections & Templates
Quick Links
Create Collections to organize your products
Store logo, photos and seller bio
At MakerPlace by Michaels, you can personalize the look of your store by adding your logo, seller photo, banner images and graphics. You can also control what shoppers see when they land on your store by pinning up to 12 products, changing your store template, and by creating and managing collections, or groupings, of products.

Pin up to 12 Items on the First page of your MakerPlace Store!
We’re excited to announce that you can now pin up to 12 products on the main page of your MakerPlace store.
You can pin products by clicking on the pin icon in the upper right portion of the image when you are in your "My Product Listings" page in the dashboard.
Pins will appear in order that you pin them. Your first pin will appear in the top left spot, and be ordered left to right from there). If you need to reorder your product pins, you have to unpin and repin them again. Pro tip: Develop a plan and pin your products in the order you want them to appear.
Any new listings you add will appear after your pinned listings. If you have pinned 12 products, new listings will appear starting on page 2 of your listings.

Organize Your Store with Collections!
You can also organize your store and help shoppers find what they are looking for more quickly by creating Collections for your store. Collections are a way for you to group items in your store. They are essentially a filter for a buyer to see what you offer. Note: these are not official MakerPlace categories or filters for purposes of searching or browsing. Instead, they simply make the experience of shopping in your store easier for customers. Additionally, there is no pinning available in collections.

How to create a collection
Go to your “My Product Listings” page in your seller dashboard.
You will see the below screen.
To create a collection, click on “Manage Collections”

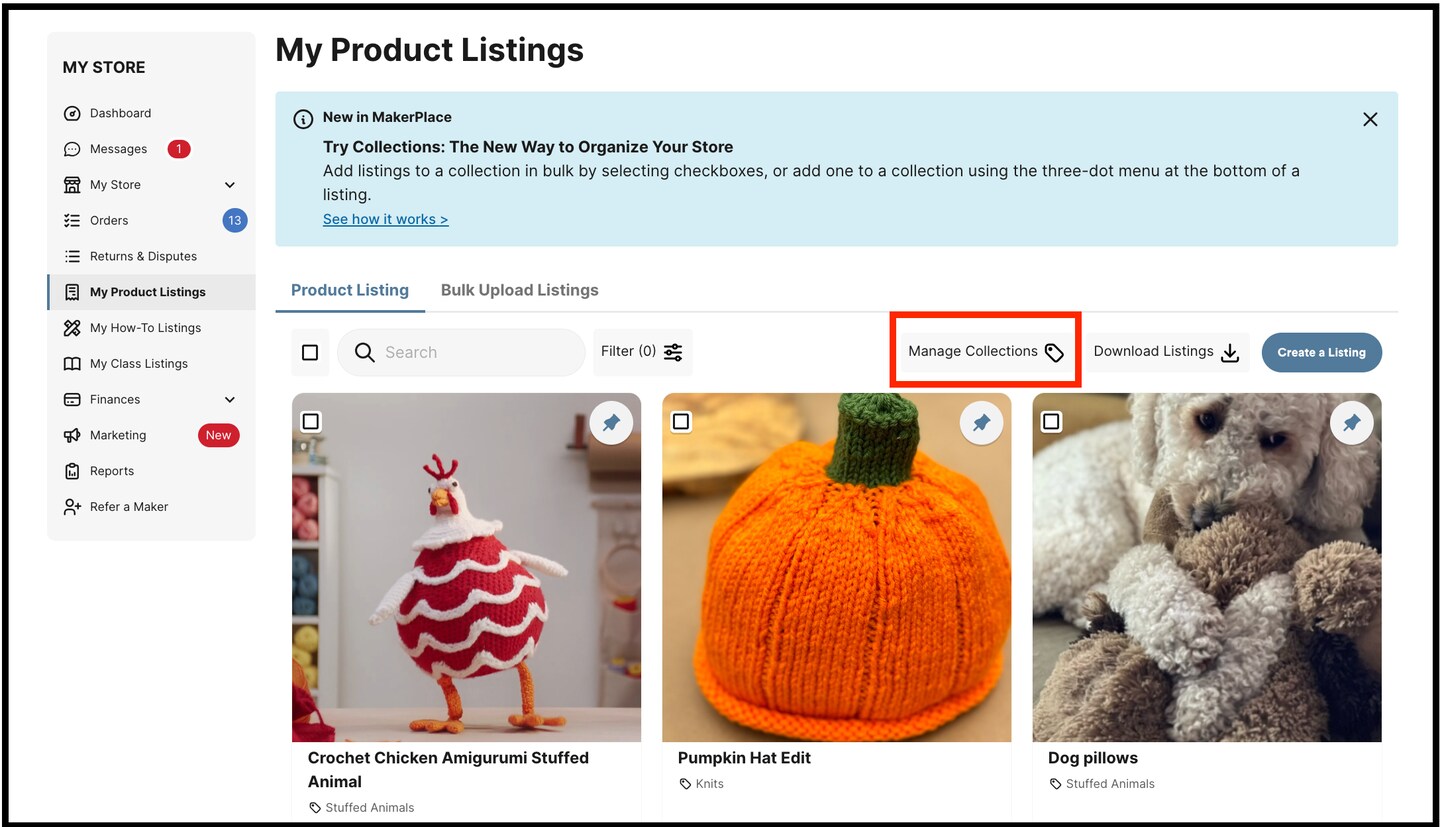


You will see the below "Manage Collections" window pop up.
If you are getting started, you will be prompted to add a new collection.

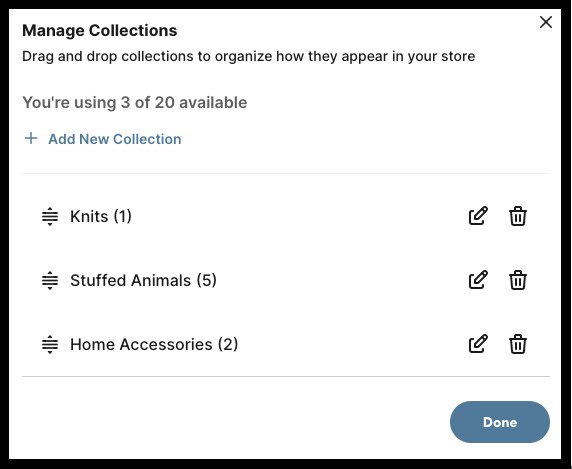

Click “+ Add New Collection”
Name your collection/s
Use a collection name between 4 and 24 characters (Allowed characters: letters, numbers, blank space, *, %, !, dash, apostrophe, #, @, +, ( ) parentheses)
Examples: Weddings, Knits, Holiday 2024, Men’s + Women’s Shoes, 25% Off Sale, etc.
You can have up to 20 collections, and continue to add and manage collections in this window
You can edit the name of your collection in this window
Note:
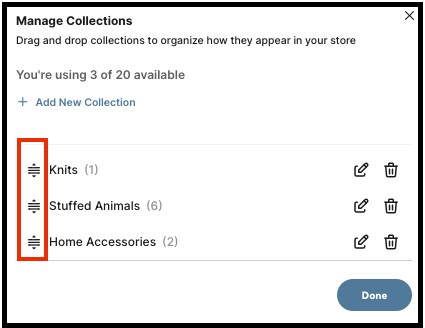
- Collections are listed in the order you created them. But you can also drag them to reorder your collections as you wish.
- Each product can only appear in one collection
- You can delete a collection. Doing so will NOT delete the listings (listings will simply be added to "All” (ie, no collection) categorization.
- Use the "stack" icon (highlighted below) to change the order that your collections are listed in and appear in your store.


How to Add Products to a Collection
When you want to add listings to a collection, you can do so in two ways:
Option 1:
Check the box in the upper left of your product listing card in “My Product Listings.”
A secondary menu will appear right above your listings, allowing you to “clear selection” or “Add to collection.”

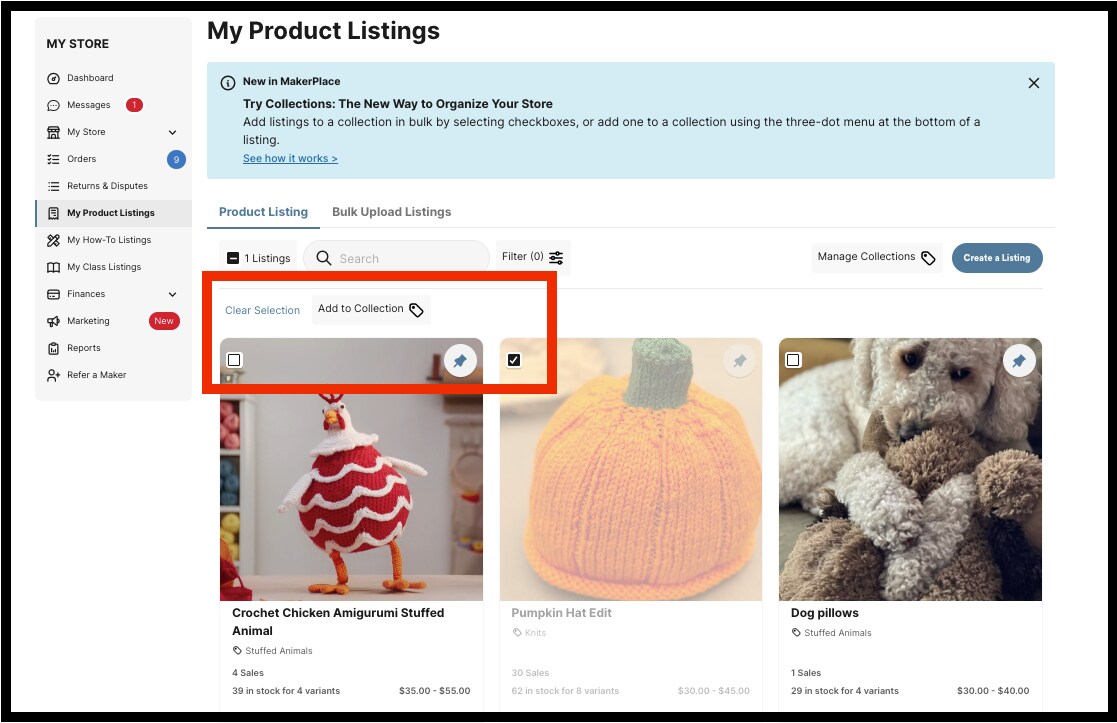

Here, you can clear your selection or add to a collection.
If the product you selected is already in a collection and you want to change it, you will see a prompt indicating your product can only be in one collection, and confirming you want to make the change.

Option 2:
Click on three dots under a product card. Click on “change collection”

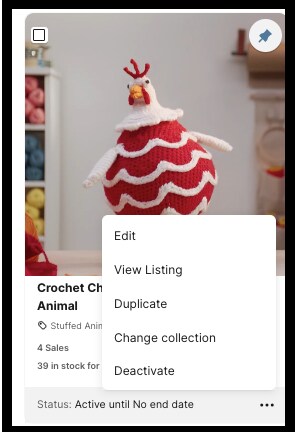

Follow the prompts to assign your product to the collection you want to (or you can create a new collection to add it to here, too).

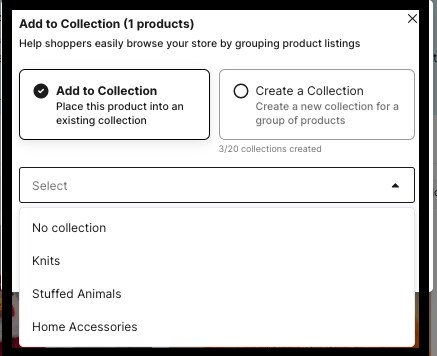

When you click “change collection” you can either add to an existing collection or you can create a collection.
If your listings are in a collection and you want to take them out of a collection, click “no collection”
You can switch your products to another collection this same way.


How to manage your collections
Back on your “My Product Listings” page, you can easily search and filter for products, by collections, listing status and category.


What do Shoppers See With Collections?
Collections are displayed in the left navigation rail of your store. If user clicks on Weddings, or whatever collection you have, they will only see products that have been assigned to those collections.


Shoppers will no longer see categories that your products are assigned to in the left nav rail. They will only see names of collections. If you haven’t set up selections it will show All products. Anything not assigned a collection will be included in the “All Products" collection.


MakerPlace Store Templates
Additionally, MakerPlace offers two store templates to choose from, so you can organize your listings in a way that’s functional and attractive. These templates offer different benefits to you as your catalog grows in size and variety.
Best of all, you can refresh your images or switch templates whenever you like at any time as your store grows and evolves. For instance, you may want to change your banner image to match the season, or switch templates as you accumulate more listings.
There are two types of templates:
Standard Template
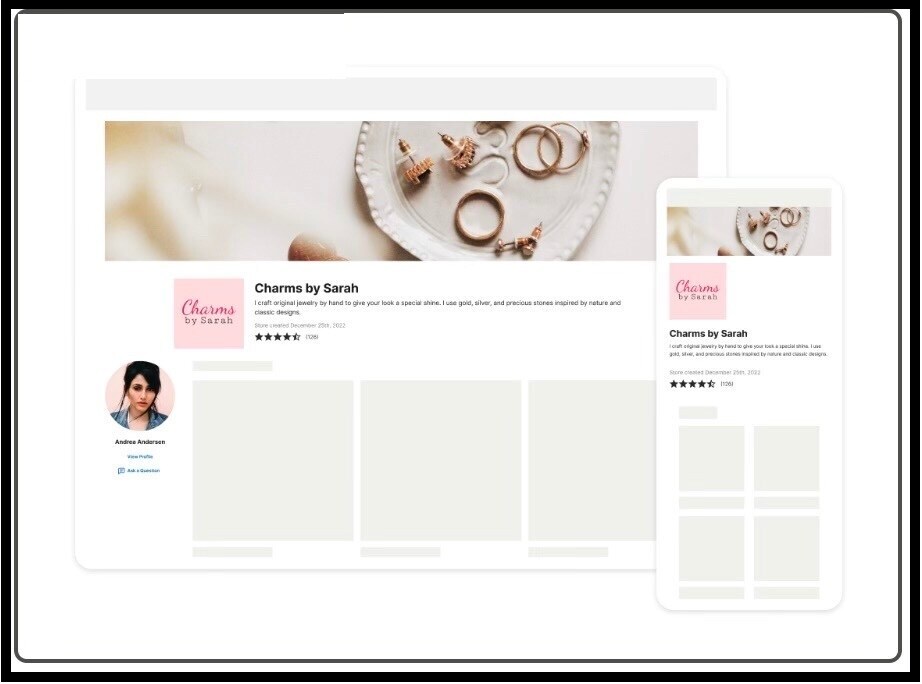

Features:
Unobstructed full-width banner
Store logo
Seller photo
Stacked view of listings (Everything’s on one page.)
Best For:
Sellers with fewer listings
Sellers whose listings primarily fall under one category (e.g., just products)

Enhanced Template
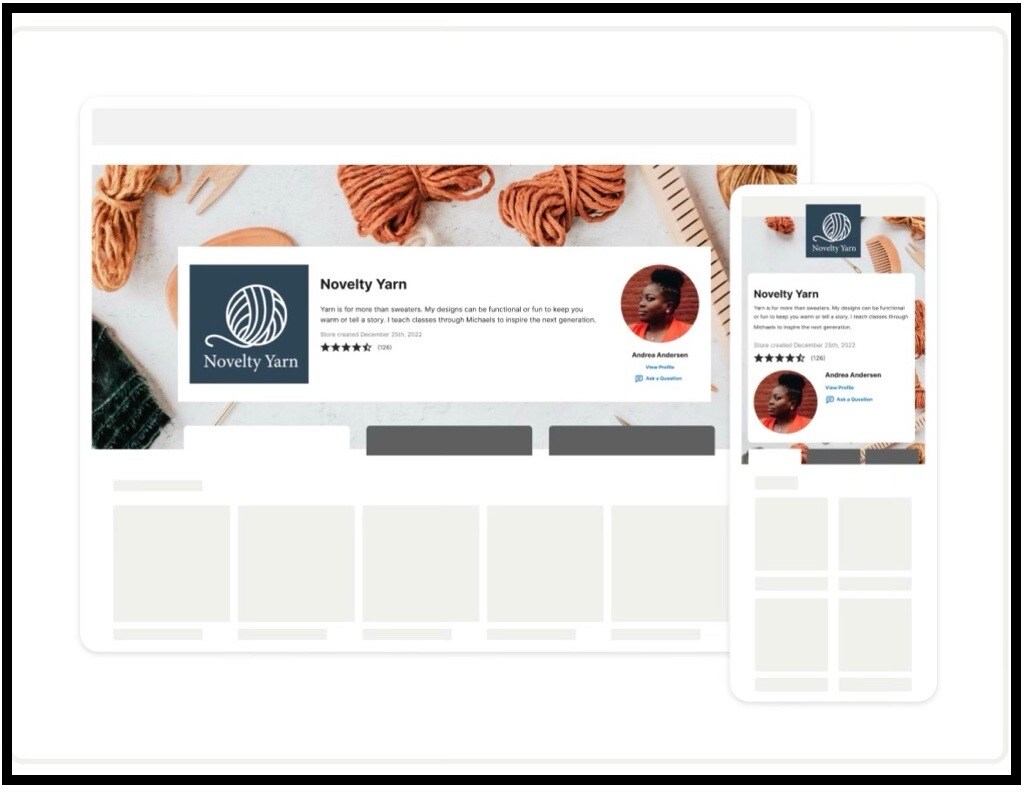
Features:
Background image banner with carousel for top-selling products
Store logo
Store photo
Tabbed pages for each listing type
Best For:
Sellers with lots of listings
Sellers with multiple listings in two or more categories (e.g., products and classes)

Adding or refreshing your imagery and bios
The easiest way to customize your store is by picking imagery for your store banner, logo and your profile photo.

Banner photo
This image will run across the top of your store’s page, and can be changed at any time.
Picture file type: JPG or PNG
Max Size: 10 MB
Minimum size pixels: 1360x400 pixels
Brand logo
Pick a square image (Minimum 12x120 pixels)
Picture file type: JPG or PNG
Max Size: 10 MB
Minimum size pixels: 1360x400 pixels
Profile Photo
Customers will see your profile photo when viewing your product, class and how-to listings
Picture file type: JPG or PNG
Max Size: 10 MB
Minimum size pixels: 120x120 pixels
Circle cropping


How to Update your Store Description
Help shoppers connect to your brand by sharing some background about how you started making handmade items. To optimize search results, you should also list the types of items your store will sell.
Max 1,200 characters.
Get tips on on how to write a compelling store description and maker's bio.